High Accurate Resistance Measurements
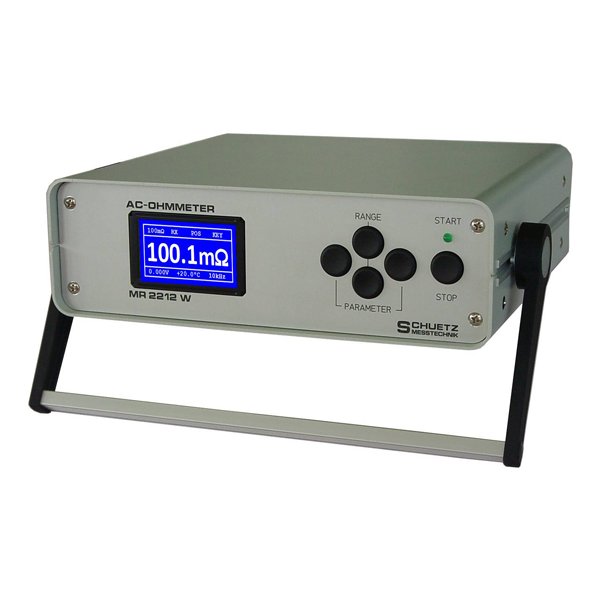
MR 2212 W
for accumulators, fuel cells, batteries, separators …
The MR 2212 W measures the interior resistance of objects with a natural voltage, including batteries, fuel cells, accumulators, separators and power racks.
With its large range from some 10 µΩ to 2 Ω it is widely used in R+D, monitoring and trouble-shooting applications. The feed line resistances are compensated by the 4-pole measuring method according to Kelvin. In addition the temperature of the test object (PT 100) can be monitored continuously as well as its direct voltage. The MR 2212 W can be connected to the test object even while it is in operation. This makes continuous monitoring possible, and all measured values can be recorded at any time by a connected computer.
Limit values allow the release of alarm signals on site via a control system or a computer.
The sophisticated recognition of contact errors at the holding device itself is one of the most important features, as it enables you to distinguish between such errors and actual defects of the test object.
The corresponding error messages, as well as the actual defects of the test object are not only transferred to the control system, but also displayed clearly on the MR 2212 W front panel. An automated measuring system is provided which is activated in case the value measured is below / above the measuring range.
It is only necessary to program the instrument once via the RS232C interface, in order to operate the instrument with these parameters at manual measuring setups or with an industrial PLC system.The instrument can be controlled completely via RS232C using a computer terminal, by single contact opmode (footswitch) or using the frontpanel keys.
| Resistance measurement | |
| Ranges | 2.000 mΩ – 2000 Ω, decadic |
| Min. values below 3% error | >= 0.1 mΩ (e.g. 107 µΩ) up to 2000 mΩ |
| Current | 100 mA at 2 mΩ and 20 mΩ, 10 mA at 200 mΩ , 1 mA at 2 Ω Frequency selectable 1 kHz or 10 kHz |
| Range select | automatically, keypads, via RS232 or via IEEE-488 (optional) |
| Speed | approx. 2 s |
| Voltage measurement | |
| Range | 2 V, 20 V, 200 V |
| Circulation pump | 230 V AC or 115 V AC |
| Max. measurement error | ± 0.2 % of MV ± 2 digits |
| Input resistance | 1 MΩ |
| Speed | approx. 400 ms |
| Temperature measurement | |
| Range | - 20 °C to + 100 °C, linearized for PT 100 |
| Max. measurement error | 0.2 °K (no probe error) |
| Sensor type | several PT 100 temperature probes |
| Speed | ca. 600 ms |
| Error detection | prior to EVERY single measurement |
| Current connection errors | LCD: ‚CURRENT‘, RS232: ‚ECUR‘ |
| Sense connection errors | LCD: ‚SENSE‘, RS232: ‚ESEN‘ |
| Overrange >80% | LCD: ‚OVERLD.‘, RS232: ‚EOVL‘ |
| Limit values | using keypad, via RS232 |
| limit over- / underflow shown | on LCD, via RS232, via PLC |
| Start of measurement | using keypad via RS232 and IEEE-488 (optional) via PLC (potential free contact) via foot switch (optional enhancement) |
| Ports | RS232C (full external control) SPS (<,=,>,OVL,CUR,SEN,EOC,GO,REM) printer (parallel, ANSI standard) single contact op. (potential free) IEEE–488 (optional) |
| Size | 260 x 80 x 240 mm (WxHxD) |
Fuel-Cells – Lithium Batteries

- Range from 2 , 20 , 200 mΩ , 2 Ω, decadic
- max. resolution of 1 µΩ
- measurement error ± 0.5 % of MV ± 3 Digit
- Including voltage measurement
- Including temperature measurement
- Limit parameters as well as visual contact errors at the holding device enhancements (ok, too low, too high), including switchable acoustic signal
- RS232C port to get full external control over the instrument
- Centronics printer port
- PT 100 1/10 DIN – temperature probe:
4-pol. MiniDIN connector
cable length 1,5 m
F = ±(0,03°C+0,0005•|t|) - IEEE – 488 enhancement:
control the instrument via IEEE – 488 - MP multiplexer enhancement:
internal multiplexer, up to 48 channels
(higher channel count by request)
POSition for identifying the cell number - Foot switch:
to start measurement externally - Software MR2212 XFER
sends measurement values to any spreadsheet program or text-editor.
For Windows© 10, 2000, XP. - DAkkS – calibration certificate from the
‚Deutscher Kalibrierdienst‘

DIN EN ISO 9001:2008


