PWD 2000 al-Co W/A/L
Cable holding device featuring Water flow or reposing Air system
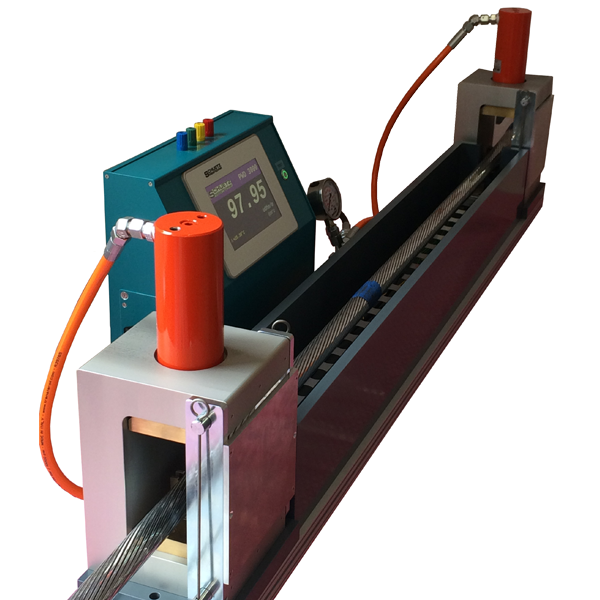
The precision holding device PWD2000/P is used for the determination of the electric resistance per meter of power and medium voltage cables. The measurement is based on the 4-pole method according to Kelvin in order to eliminate the feed line resistances. The measuring current is supplied via hydraulic operated jaws, the measuring voltage picked up via spring-supported taps, with a distance between the taps of 1000 mm (+/- 0,1mm).
The current jaws and thus the current feeding points are arranged at a sufficient distance to the taps in accordance with DIN/IEC to ensure a constant and uniform distribution of the current across the actual measuring distance.
Water flow version /W
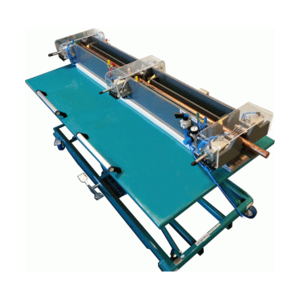
The conductor sample to be measured (length. approx. 1400mm) is placed in a twin-trough. The inner trough, which is filled with flowing water when the pump is running, contains the potential bar for picking up the measuring voltage; it is here where the actual measurement takes place at a constant (water-)temperature. A connected Microohmmeter (e.g. MR300C-A or MR101-PWD) additionally measures the (water-) temperature via a probe and converts the previously measured resistance value to 20°C. The mechanical main function is like the PWD2000 P/L.
Air reposing version /A
There is one closed trough for the measuring system which is carefully isolated against flowing air from outside. After a given time the temperature of the sample is stable and identical to a special probe. The principle is the same as in the MAT2000T measuring system for stranding machines which is successful used with copper and aluminium cables.
Hydraulic current contacting
This standard holding device is suitable for aluminium and copper cables (stranded round and sector-shaped conductor samples) of a size between 10 and 2500 sq.mm.
In contrast to Copper which can be easily contacted to all single wires inside a sample Aluminium creates a problem. Due to the insulating oxide surface of each wire which will grow within minutes in presence of humidity and oxygen contacting all wires seems to be impossible. To solve this problem very special contact blades are used together with a very high pressure. This requires a hydraulic instead of a pneumatic or even manual driven system.
Sample tension /L
In many cases it is preferred to tension the cable, which does hardly slag anyway due to the cable support, by applying a longitudinal tensile force, in order to obtain even more accuratemeasuring results. This is done with mechanically adjustable longitudinal tension and its real effect is widely overestimated.
| Measuring distance | 1000 mm ± 0,1 mm |
| Length of test object | 1500 .. 2000 mm (depends on sq.mm) |
| Cross Section (Model 2000): | 16 mm² - 800 / 1200 / 2500 sq.mm |
| Measuring current | 20 A max. (Micro Ohmmeter) |
| Water flow version | |
| Temperature probe | PT100 1/10 DIN (high precision) |
| Bath | Water capacity approx. 15 l |
| Circulation | integrated water flow system |
| Circulation pump | 230 V AC or 115 V AC |
| Air Reposing | |
| Trough | protected against air flow from outside |
| Temperature Probe | Infrared with automatic adjust control for high precision |
| Hydraulic Contacts | |
| Nominal pressure | up to 80,000 N |
| Holding / release of test object | by switch (open / close) |
| Security | Holding procedure only by closing covers |
| Longitudinal feed force (model L) | Option |
| Model overview: | |
| PWD 2000 AL-Co W/A | no longitudinal tension device provided |
| PWD 2000 AL-Co W/A-L | Tensile force required can be adjusted. |
Micro-Ohmmeters MR300C-A / MR100-101
The MR300C-A Micro-Ohmmeter features a constant current system, which guarantees an extremely stable measuring current (max. 10A) during a measurement. The measuring result is calculated as the quotient of the voltage drop across about an internal reference resistor and the (amplified) voltage drop across the test object. Before each main measurement, in which the measuring current flows, a zero measurement without measuring current is performed, in which any offset voltages, in particular the thermo-electric voltage, are determined at the test object.
Due to this complex measuring procedure the measuring time of the MR300C-A is somewhat longer than that of comparable instruments. On the other hand, it is this complexity that guarantees the high accuracy and the very high long-term stability. The measuring current does not flow continuously, but only for a short period of a measurement. For this reason, the heating-up of the instrument is reduced, and therefore a more compact design of the MR300C-A is possible.
Furthermore, the test object is measured more accurately, as it does not heat up. The temperature measurement converts the measuring value obtained to 20°C using a coefficient of 0.392%/K for copper and 0.400%/K for aluminium. The object temperature is measured via a probe ( or entered directly), the conversion can be switched off (for control with a reference As the MR300C-A performs a quotient measurement with exclusive reference to the internal reference resistors and compensates the all offset voltages of the amplifiers and the thermoelectric voltage at the test object, an extreme stability of the measured values ,over long periods is reached. The measurement error reached only depends on the stability of the reference resistors. The modification and ageing of any components do not affect the result of the measurements in any way. Unlike reference voltages and currents, such long-term stable resistors can be realised easily.
The MR100/101 is the version without user control panel. This is done by a super imposed embedded computer with easy readable color display, touch panel and self explanatory handling.

- Microohmmeter MR 300 C-A:
The ideal instrument in conjunction with this holding device. - Microohmmeter MR101:
Like the MR300C-A but with addional settings and informations in the display. - Software MR300C-A XFER
sends measurement values to any Windows© and Linux OS. - Temperature probe 5 °C to 60 °C
- Calibrated testpattern calibrated by DKD
- Adapters, Current Contact Blades for different materials (copper, aluminium) and shapes.
- Measuring range from 10 µΩ – 100 Ω
- max. resolution of 10 nΩ
- Display 4 ½ / 5 ½ digits
- Measuring error: typ. ± 0.02 % , ± 0.05 % max.
- Temperature conversion to 20 °C
- Pulsed short current flow for minor heatup
- Contact error detect prior to measurement
- USB port to get external control
DIN EN ISO 9001:2008


